CRON is a time-based job scheduler in Unix-like operating systems. It enables users to schedule jobs (commands or scripts) to run periodically at certain times or dates. In Osclass, CRON automates tasks such as sending email alerts, counting items per category, and running plugin actions.
While Osclass offers a built-in CRON functionality, using your system’s native CRON service provides better performance and reliability.
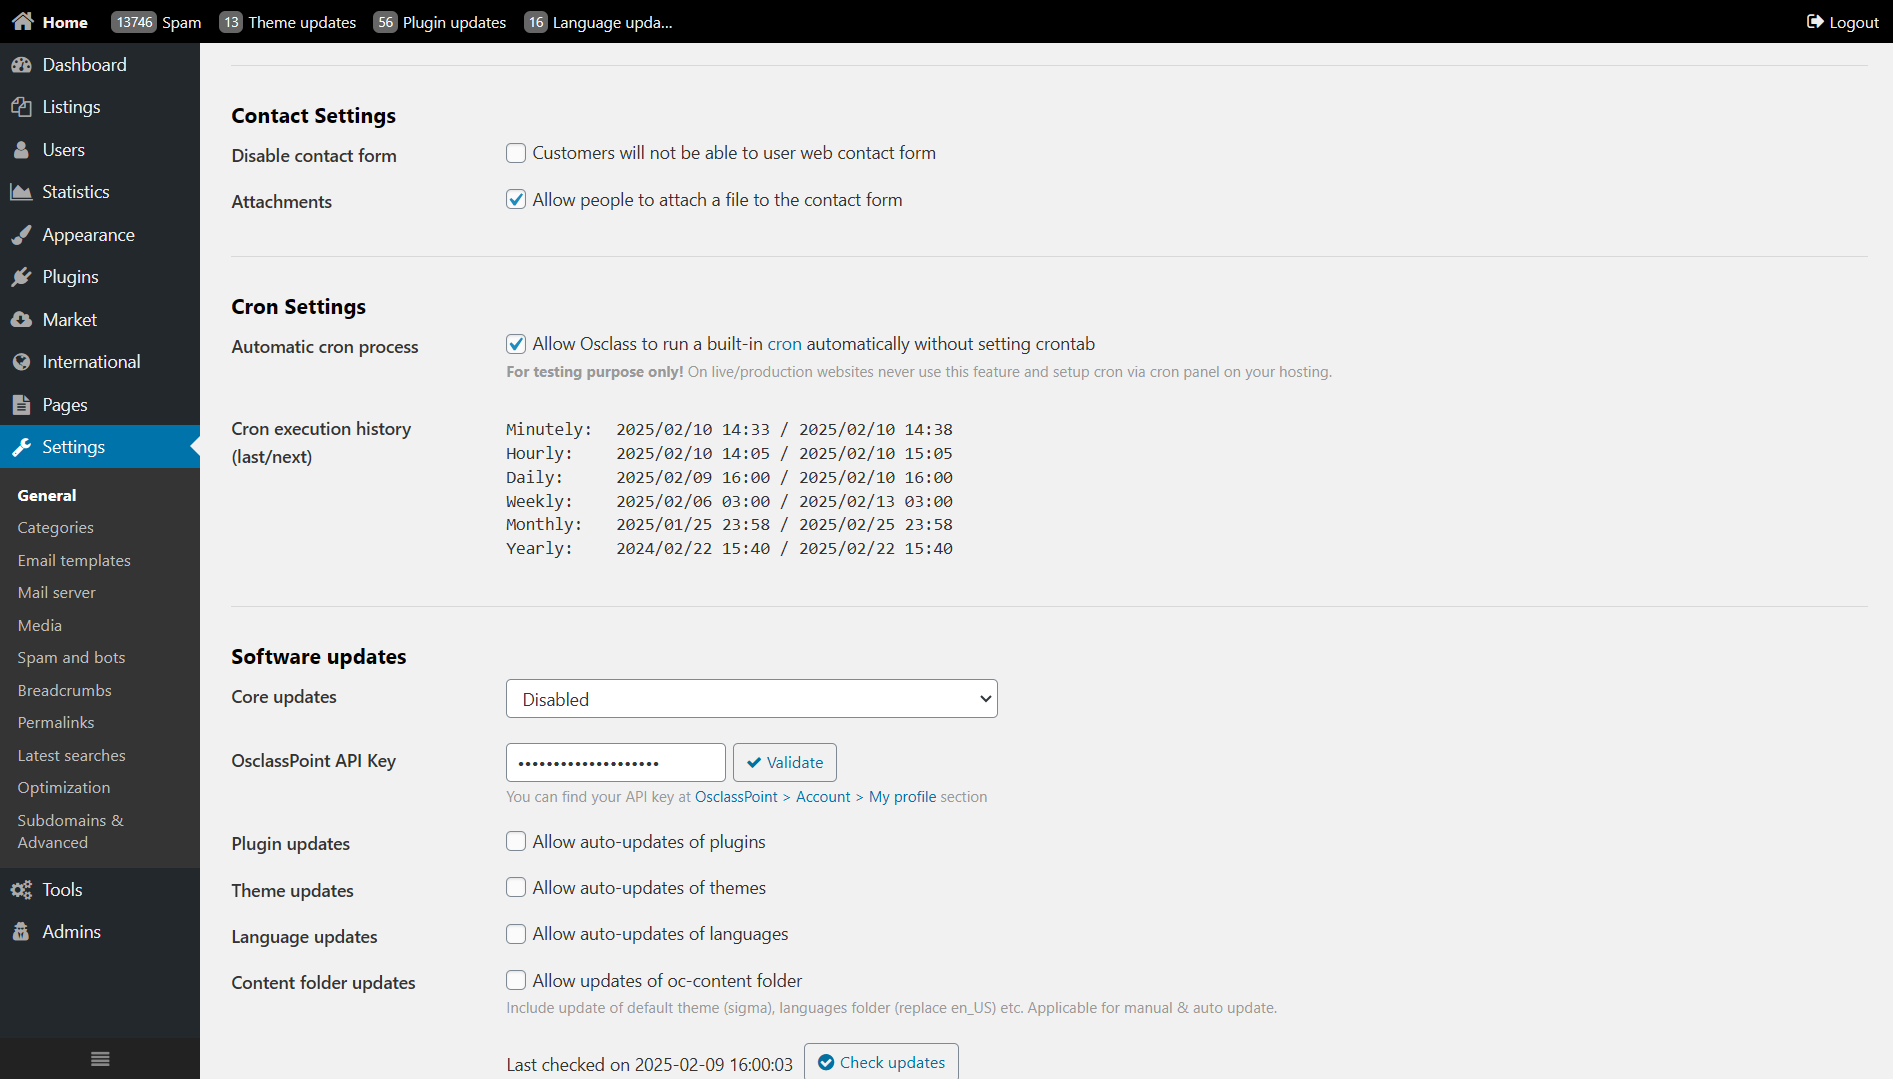
Osclass provides an internal CRON system for those who cannot set up a system-wide CRON job. To enable it:
Warning: The built-in CRON system is unreliable and should only be used for development or testing. For production websites, a system CRON job should be configured.
In the Cron execution history section of your Osclass backoffice, you can check the last execution time and the next scheduled run for different CRON jobs: minutely, hourly, daily, weekly, monthly, and yearly.

To use your server’s CRON service, disable the automatic CRON processing in Osclass and manually configure CRON jobs.
To configure system CRON jobs, you need SSH access to your server. If your hosting provider does not offer SSH access, check if they provide a CRON manager in the control panel.
To edit the CRON job list, use the following command:
crontab -eAdd the following CRON jobs to automate Osclass tasks:
*/5 * * * * usr/local/php5/bin/php /home/your_username/public_html/index.php -p cron -t minutely
0 * * * * usr/local/php5/bin/php /home/your_username/public_html/index.php -p cron -t hourly
0 0 * * * usr/local/php5/bin/php /home/your_username/public_html/index.php -p cron -t daily
0 0 * * 0 usr/local/php5/bin/php /home/your_username/public_html/index.php -p cron -t weekly
0 0 1 * * usr/local/php5/bin/php /home/your_username/public_html/index.php -p cron -t monthly
0 0 1 1 * usr/local/php5/bin/php /home/your_username/public_html/index.php -p cron -t yearly
Modify the PHP path (usr/local/php5/bin/php) and the Osclass path (/home/your_username/public_html/) based on your server configuration.
If your hosting provider does not allow direct CRON access, you may have to configure it through their admin panel.
wget https://yourdomain.com/index.php?page=cron -O /dev/nullwget https://yourdomain.com/index.php?page=cron -O /dev/nullIf you cannot set up a CRON job manually, Osclass provides an automatic CRON option. However, this should only be used in development as it is unreliable for production sites.
With Auto-CRON, tasks will run when someone visits your site. This method is not ideal because it depends on traffic volume.
Configuring CRON jobs properly ensures that Osclass functions smoothly by automating essential tasks. It is highly recommended to use your hosting provider’s CRON job functionality instead of Osclass’ built-in feature for better performance and reliability.